Super Insulation:
My adventures in Extreme Insulation
Here is how I've been super insulating my old house (doubling + typical R's- Click Here for why THIS is super insulation) with it's endless challanges, uniquness, variability, and really really tiny attics! Click here for the how's and why's.
The nitty gritty, dusty, sweaty, details:
Ceiling Air and Moisture Infiltration Barrier
|
Photo Album Gallery Place Holder - Please wait while the Photo Album loads.
If the album does not show, please refresh the page to try again.
|
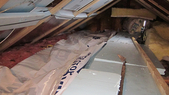
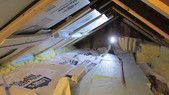
Rube Goldbergs' s exisiting attic Super Insulation / Deep Energy Retrofit.
-
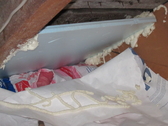
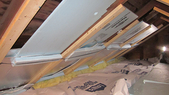
Phase 1: Two layers 2 inch foam 2 feet wide as walkway to work from, allow inspection and work without crushing insulation in years to come. Cover with old celotex to keep insulation unharmed.
-
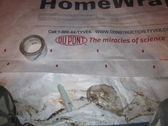
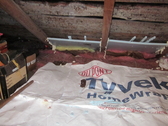
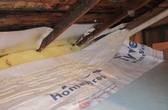
Phase 2: Layer of Tyvek, accept no substitute, really, is it worth the risk? Over the entire attic floor, over the 12 inches of existing insulation. This will stop air movement up from below, via wind pressure and stack effect, the main mover of moisture. Moisture should not condense on it (as a cold condensing surface), since 22 inches of insulation will be installed over it, keeping it on the 'warm side'.
-
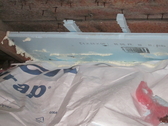
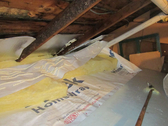
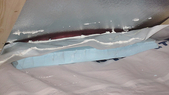
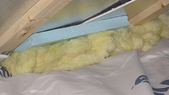
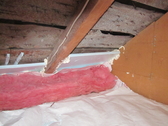
Phase 3: Retro - fitting the air / vapor barrier: RAM batt insulation, rated for vapor barrier (it's a theory), between all rafters, at eaves, over exterior wall. Yes, this will block air flow up from the eaves, such is life. It's this or what? Recall, I'm tapped out, can't hire someone to blow in insulation or rip everything out, apply spray poly U over top of ceiling. Now take sheet of 1 inch foam, cut to size between roof rafters, spray foam around edges, and RAM down ontop of that matted batt insulation, push up against nails to lock in place (leave air gap between panel and roof sheathing. Not done, now, foam up fold of Tyvek, lay against foam sheeting, RAMish batt insulation under to hold against bottom of foam. Ta Da, air vapor barrier sealed from ext. wall to ext wall.
-
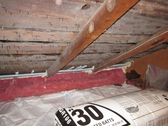
Phase 4: Two layers 11 inch R22 batt insulation, unfaced, and rated for vapor barrier (as I said, it's a theory). Lay seams off center. Yeah, there might be some compacting, but I prefer two layers with off center joints to retard air flow.
-
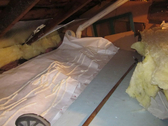
Phase 5: Loose laid plastic tarp to protect insulation from odd leak.
-
Phase 6: Decon. mold then use fan fold foundation foam over bottom of rafters, foil side up, to retard summer heat, protect from nails, channel heat up to peak for venting, keep roof cooler in winter, cutting back melting snow and ice damming.
-
Phase 7: Install new end gable vents as high up as possible.
|
|
Foam Insulation
DOES NOT EQUAL
Super - Insulation
Nothing is that easy.
Click Here
For a ton of information on wrapping your building in foam.
Insulation -
How Much Is Enough
Quick answers to your insulation questions
|
What is Superinsulation?
Attic insulation over R60, wall insulation over R40 (About double code in NYS)
When do you want to superinsulate?
New construction - All - Typically super insulation adds a bit more than 10% to new building costs.
Existing construction - Up to a 10 yr payback or when the emotional benefit of related work makes it "worth it".
FPSF -
Experiences w/
Old House Rehab
It is saving me the $40,000 or so it would cost to underpin the house, install a foundation and insulate it. Nor would this have addressed the rim joist, a major source of heat loss.
For those concerned with vermin and bugs, termites, etc. in the skirt. I've had one element in 3 yrs, in a vermin and bug heavy area, with only a few spiders taking up residence. I suspect in addtion to being pretty well sealed, it's dry and foodless.
We have noticed that we no longer have ants invading the kitchen every spring, and flies infesting the area outside the kitchen in the summer. There might even be fewer mice.
In addition, the boxout is a great ledge for planters at a real easy height to maintain, with the plants and flowers visible from inside.
I'm going to try some parsely and carrots that we can't grow in the garden, the moles keep eating them.
(Click Here For More)
|
|